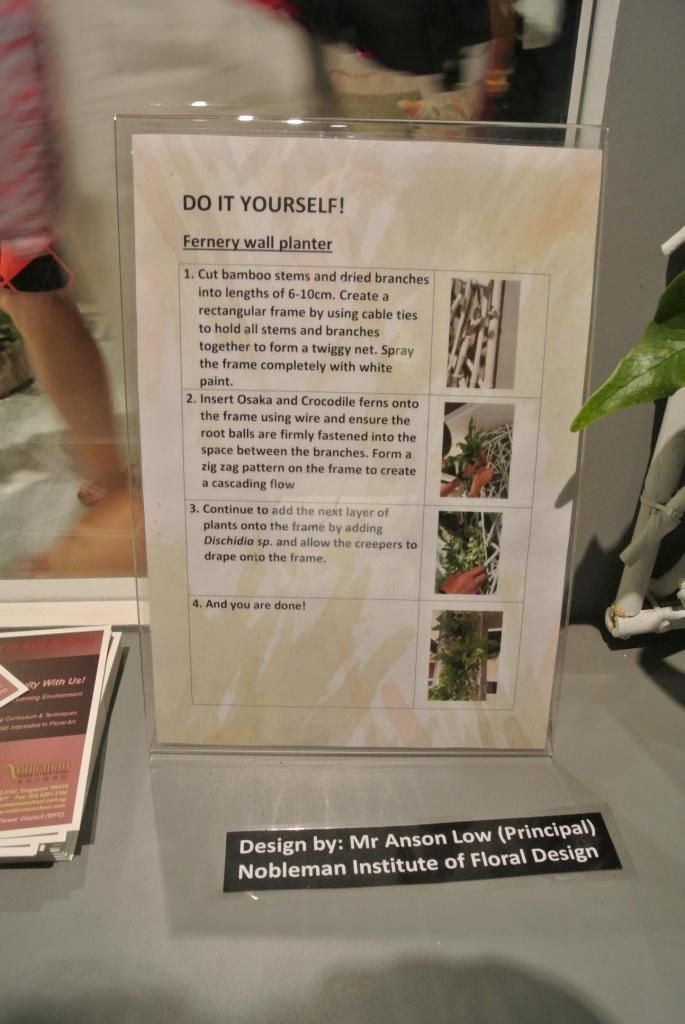
Showing posts with label indoor gardening. Show all posts

Monday, December 29, 2014

The Sorrowful adventure of Daikon

This structure was constructed from a combination of Daiso gardening wire (it came with plastic for cloching) + netting, to discourage thieving birds.

I was reading a Japanese gardening book on how to grow daikon (Japanese white radish) in a pot. Feeling very encouraged by the fotos + since Bobo and I like to eat the root vegetable + I wanted to compete against CU (chinese uncle - see earlier posts- who was growing them in the community garden downstairs), I decided to try it myself. The book advises sowing seeds in circles, then thin the seedlings out in phases so that only five daikon plants remain.

Well. Natural selection and my laziness in watering (I relied on the monsoon season) killed off everyone but two. So I ended up transplanting my tomato plants into the pot instead, devastating Bobo who hates tomatoes.

Monday, December 1, 2014

Decorative Indoor Gardening Ideas

Bark


Materials needed:
Aluminium, Bark, Empty bottle, hot glue gun

Steps:
1. Put the plant into the empty bottle.
2. Arrange the pieces of bark into appropriate heights, then apply hot glue to adhere the bark to the bottle.
3. Wind the aluminum around the bark.
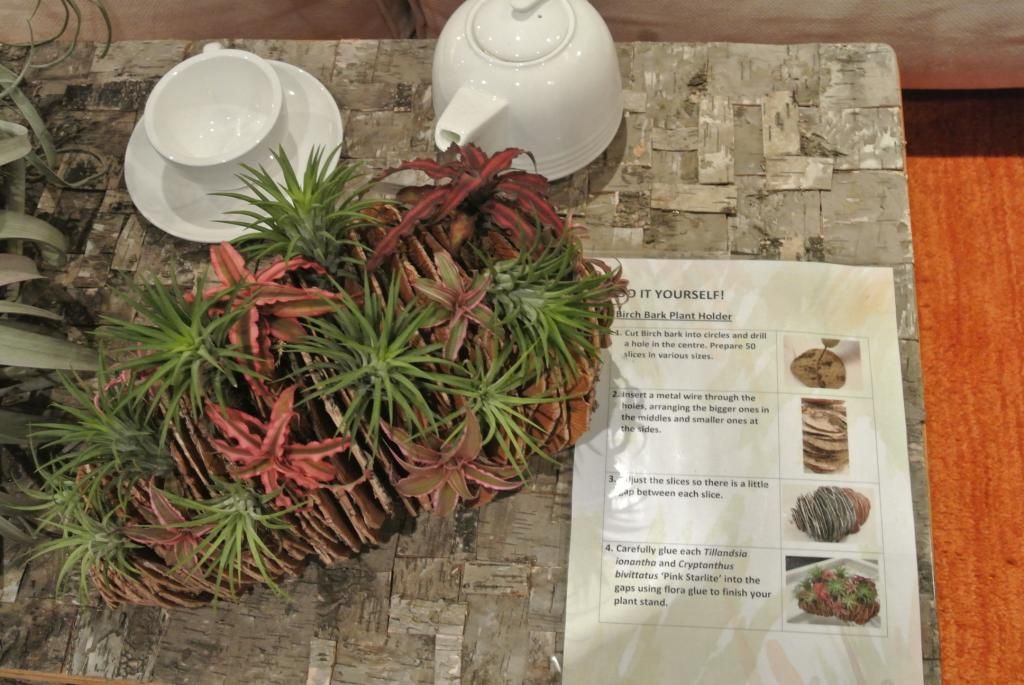
Driftwood
Materials needed:
driftwood, sand, soil, ivory pebbles, seashells, wooden spoon, bamboo chopsticks

Steps:
1.  Put soil within the crevice of the driftwood.
2.  Plant varied sizes of succulents in the soil. Water the plants before covering with a coat of sand.
3.  Lay out the seashells and ivory pebbles on the driftwood. 

Soap Box

Materials needed:
soap box, sphagnum moss, string, scissors

Steps:
1. Retrieve the plant from its pot, and cut off excess roots.
2. Shape the root ball into a sphere with additional soil.
3. Cover the root ball with sphagnum moss.
4. Use the string to secure the moss sphere.
5. Place the sphere on the soap box.

Heart to Heart

Materials needed:
sphagnum moss, string, aluminum

Steps:
1. Wrap moss around soil, wind thread around the shape before forming it into a heart.
2. Form a gap within the heart to put in the seeds before winding more thread around the heart to secure the shape.
3. Poke the aluminum through the heart to tie both hearts together before shaping one end of the aluminum into a heart shape.

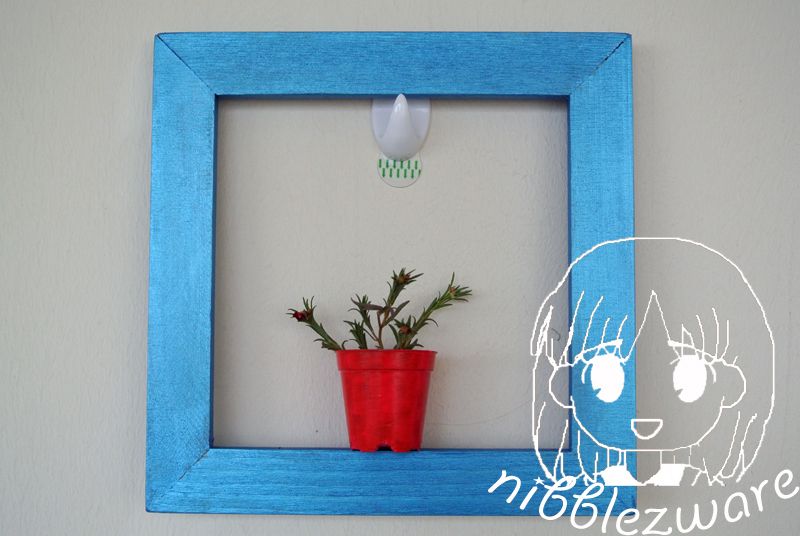
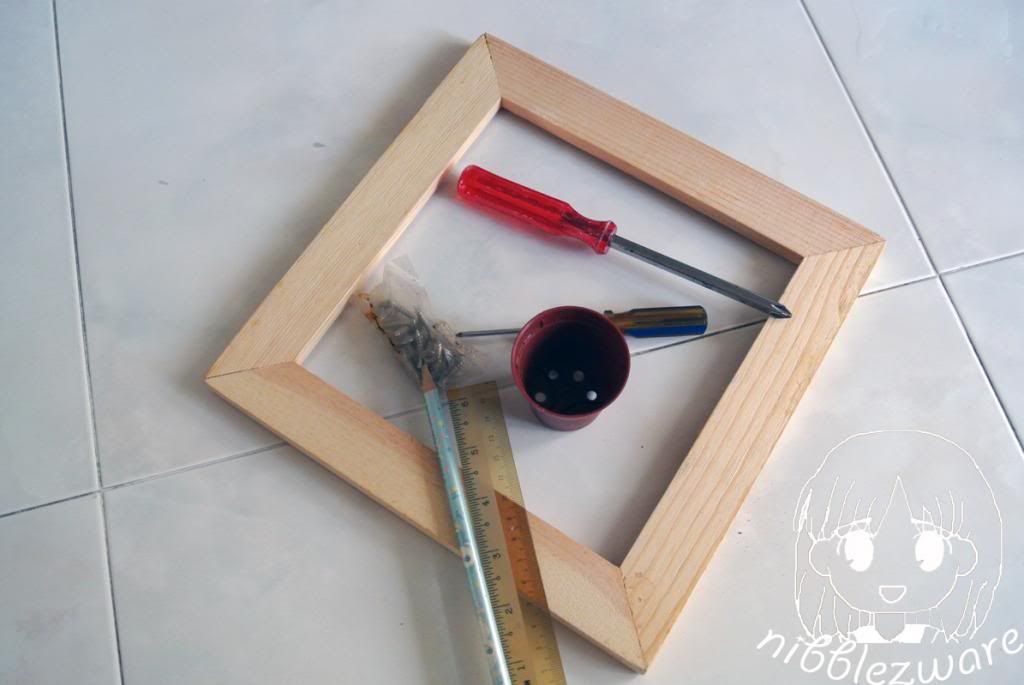
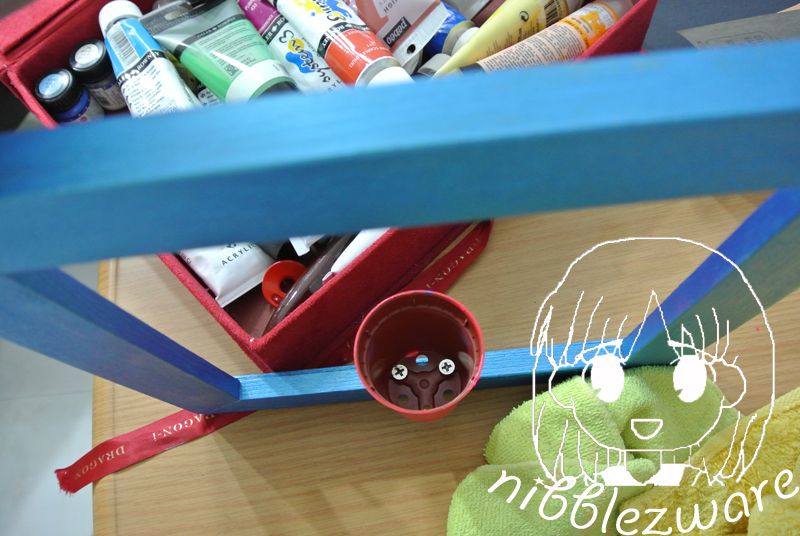
Air Plant Picture Frame

Materials needed:
2 wood pieces 20cm, 2 wood pieces 12cm, 2 lengths of twine 40cm each, driftwood, seashells, nails, hammer, hot glue gun,resin

Steps:
1. Form a picture frame by adhering white glue to the ends of the shorter wood pieces to the longer ends.
2. Nail the frame together to stabilize it.
3. Attach an appropriately sized driftwood to the frame with hot glue.
4. Wrap some twine around the frame in a decorative manner with hot glue.
5. Attach the air plant to the driftwood with hot glue.
6. Decorate the frame with seashells.


Monday, August 25, 2014

[Singapore Gardening Festival 2014] Indoor Gardening Ideas

One of the sections I liked in the SGF2014 was the indoor gardening setup, IKEA-style. Essentially they built a pop-up apartment with lots of indoor gardening features. I loved the fact that they also set out instructions on recreating some of these awesome designs, especially that Phal wall planter.
A growing picture over your bed
DIY instructions on making it
Thought this was cute, and wanted to recreate this outside my house. Not sure what the gardening committee will think of this. No instructions. But I could tell that the flamingo was pink felt wrapped around a Daiso half basket.
Saw this on apartmenttherapy.com before. Reminds of Science Club. Never did get that botany badge.
Thought it was cute. Ignored the plant head on the left.
Product placement!
What to do with the old CRT you no longer use...
Fern wall planter. Nice! Didn't see instructions, though.
Thought this was not bad too. Though I am not into ferns and foliage.
How to do the wall planter
I liked this one. I also saw some fallen bark off a tree near MacRitchie. Time to pick it up!
Mutter couldn't resist walking around and sharing her knowledge of planting, especially when there were some aunties wondering aloud about how to grow this and that. The way she talked, you'd think she is working for the event *lol*,

Sunday, March 10, 2013

A Growing "Picture"

Art Friends had this frame + canvas offer last year. I bought three, but didn't use any of the frames to surround my completed paintings. I think one of them became the duckie I sent to Germany for Tante H, another became the Mr Bear. So I had them hanging around, taking up space. I wanted to recycle them for decorative purposes but wasn't sure what to.

I suddenly had an idea. Why not put a little flower pot on each of the frame so it looks like I am framing a growing flower. I tried to find rectangular pots so that I can fit it perfectly on the frame, with nothing protruding. Unfortunately I wasn't able to find any, so I bought little flower pots instead.

What you need is the following:
A leftover wooden frame, a little flower pot, 2 screws, acrylic paint, sandpaper (realized belatedly, as you can see, it was missing from the foto below) and portulaca. 
First I measured the distance between 2 of the drainage holes, then used a rule to find the middle of one inner side, 9.5cm, so I measured 1.1cm from the middle, and then I tested screwing the screws into the wood, so that I would have an easier time later when I screw the flower pot on.

So I painted the frame a metallic blue, the painted the flowerpot a hot pink. Had a hard time making the color stay, then realized that I should have sandpapered the surface. You'd think I remember after all that nightmare painting of the chandelier
Then I screwed the little pot onto the wood, and then put a little bit of the gingham cloth to filter the drainage holes. I put in some of the remaining peat and plucked a bit of my portulaca to fit into the pot. That's when I realized the other portulaca variety I had had been attacked by aphids. Sh*t. I was wondering why it was doing poorly, and now I know. I have a little bit of it left in another pot, so probably will transplant it into the pot when I chuck out the old plant, aphids, soil and all. Sigh.
Related Posts Plugin for WordPress, Blogger...

Because Gardening makes me wanna Dance! Thanx for visiting!!!

Because Gardening makes me wanna Dance! Thanx for visiting!!!